Design a 3d-printable system which can clean polluted water.
There are systems, where the water is initially cleaned with some kind of natural filter consisting of pebbbles, sand, and charcoal (https://en.wikipedia.org/wiki/Biosand_filter). In DIY-projects people use PET-bottles as a container/funnel containing these natural ingredients. However this filter can’t remove dissolvable contamination like salt. For eliminating the salt, reverse osmosis water filters are used (https://en.wikipedia.org/wiki/Reverse_osmosis). The de-salting filter requires a membrane with tiny pores, and very high water pressure.
Since PET bottles are even easier available than 3d-printed funnels, and any trivial 3d-printed container couldn’t withstand the required pressure for reverse osmosis, I decided to not go in this direction. A solar water distiller seems to be much better choice, and 3d-printable.
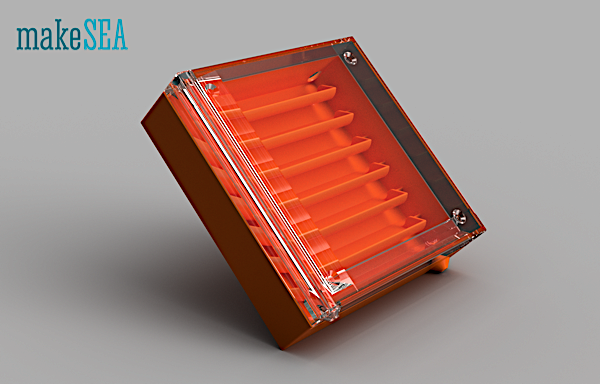
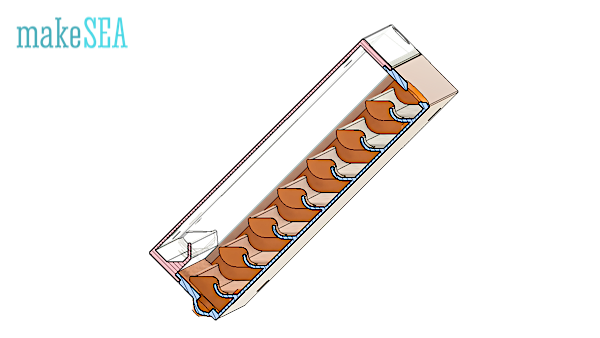
A box with a transparent lid and a black base.
The base consists of an array of basins which are filled with polluted water. The sun shines through the lid and heats up the water and the air inside the box. The water evaporates, it can’t escape the box, humidity reaches 100%. Since the lid has a lower temperature (environment temperature), the vapor will condensate and build water droplets at the inside surface of the lid. The surface of the lid is tilted, and condensated water droplets are collected in a channel at the bottom edge of the lid.
Contamination particles, and salt will remain in the basins - distilled Water is clean (mostly, see https://en.wikipedia.org/wiki/Solar_still). After a while, the basins need to be flushed out for cleaning.
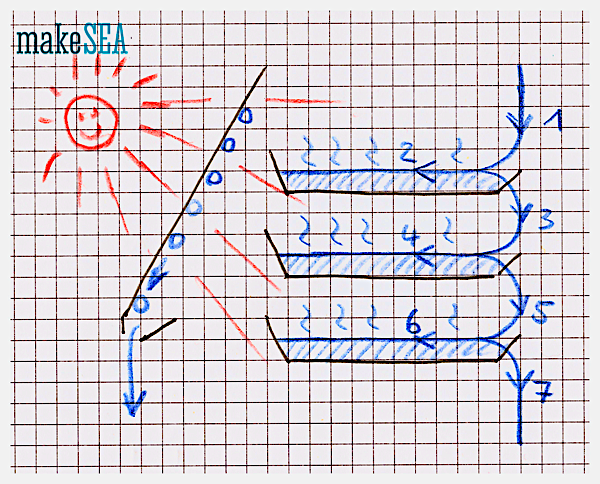
The larger the area shone from the sun, the more water can be distilled. Ideally the area is ½ square Meter or more in order to have a considerable amount of water cleaned per day. Because 3d-printing volume is much more limited, I’m designing tiles, which can be clipped together.
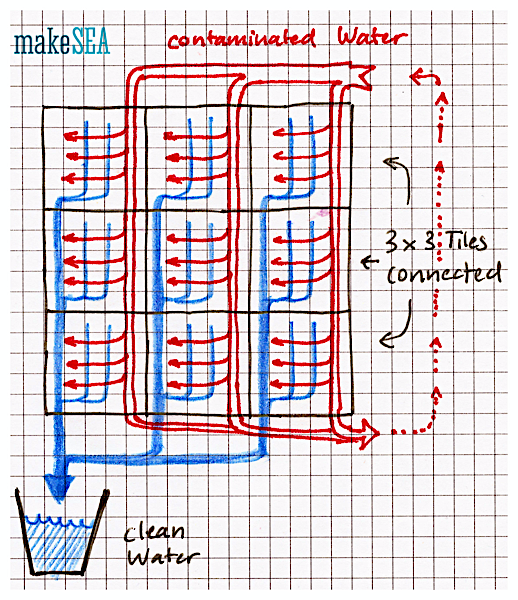
Water enters from the top into vertical channels. Clean water and superfluous water exit at the bottom, and it can enter to the next row of tiles. Superfluous contaminated water maybe is returned to the input of the system./p>
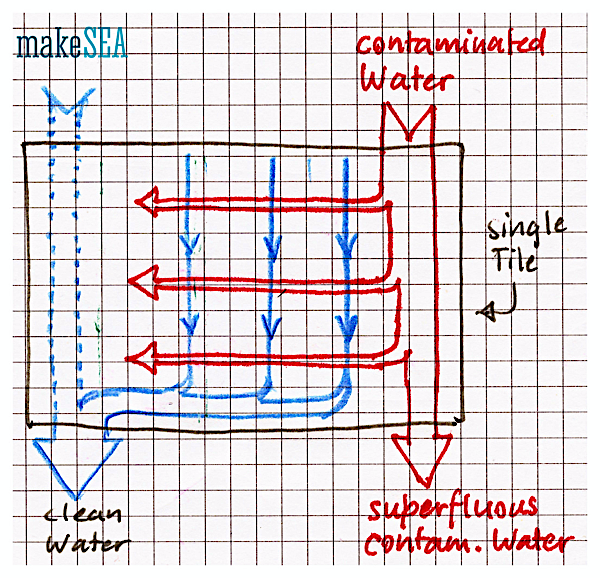
A single tile has multiple basins in order to enlarge the water surface area, and increase the amount of vaporizing water. Another reason of these basins is the reduction of flow: it would be bad, if water circulates through the basins (meander), because the warm water would flow away. Therefore the basins are dead-ends for the water, and water can heat up.
Each basin has a slightly lower overflow edge on one side of the base tile. As soon as to top basin is full, the overflowing water fills the basin below. The droplets of the distilled water flow along the lid into a horizontal channel at the bottom of the tile, which guides the clean water to the very left. Then it is guided into the main channel for collecting the water of multiple tiles. The angle is 45° (the limit for 3d-printing overhanging structures).
The illustration below shows, how the individual parts are orientated for 3d-printing. The transparent lid is oriented vertically with the channel on top, the black base is laid flat to the build plate. For connecting the tiles there are different types of clips (corner, side, horizontal or vertical inner side). Depending on the number of tiles, different amounts of types of clips are needed (like a puzzle).
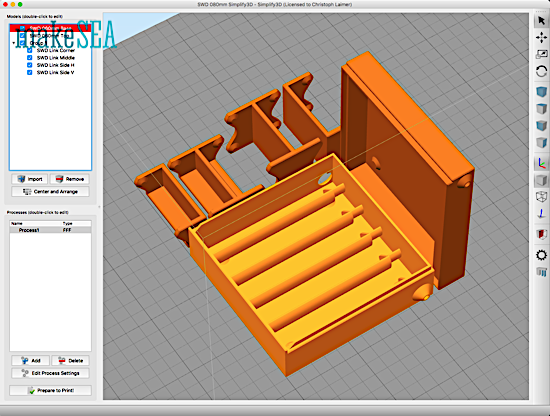
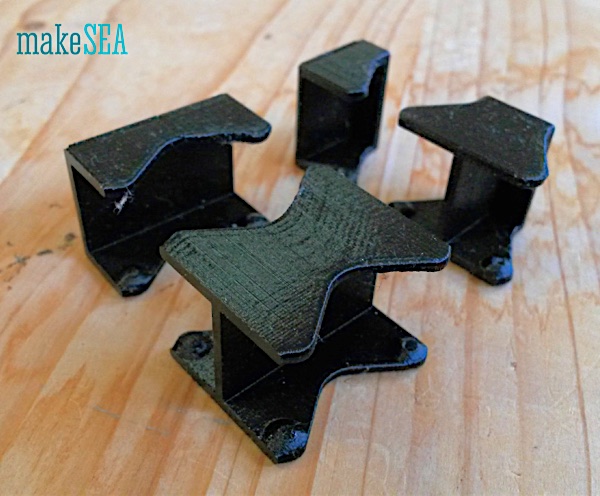
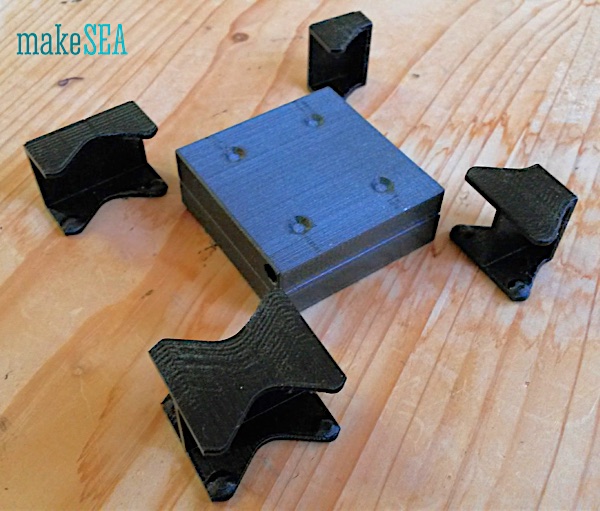
The clips hold lid and base together (the lid in the illustration above isn’t transparent, because I didn’t want to change filament for 3d-printing all the time, when I developed and tested the clips).
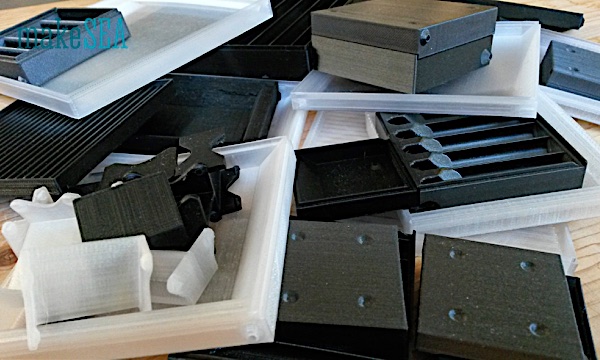
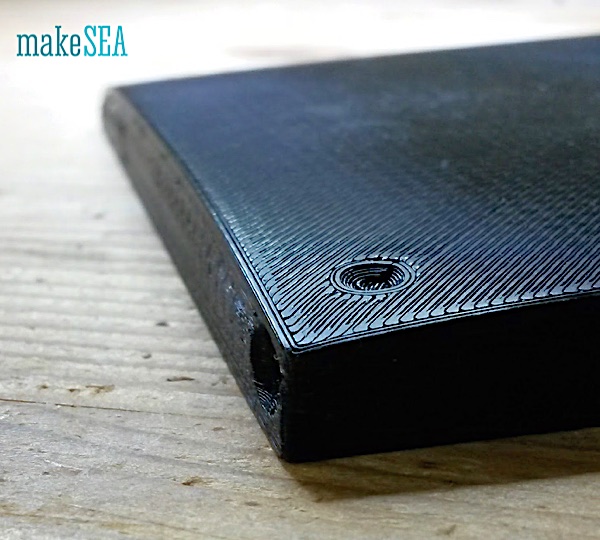
As an early proof of the concept I’ve 3d-printed the lid with transparent PETG and the base with black PLA (the type of plastic is less important than the color). The pictures (and the video) demonstrate, that the principle works. Initially the lid was completely dry, and after a while droplets appeared, and as they got bigger, they did flow into the base channel.

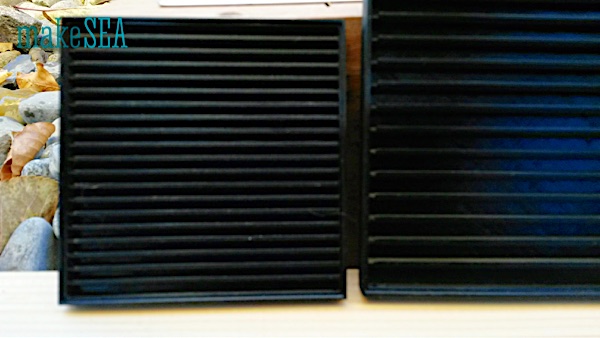
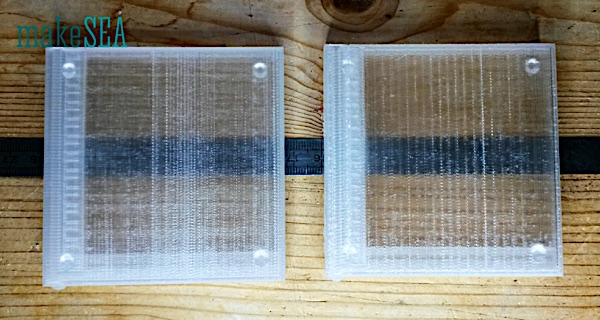
Initially I was thinking, that small basins would be a great idea in order to increase the surface area. But it turned out, that the surface tension of water has a disturbing influence on the desired flow of water. Basins must have a minimum size. For experimenting I created tiles with different sizes. The smallest on the left is 80 mm wide, the middle is 100 mm, and the large on the right is 120 mm. Also the number of basins were different. These tests showed that the minimum distance between the basins needs to be 12 mm in order to have a proper flow of water.
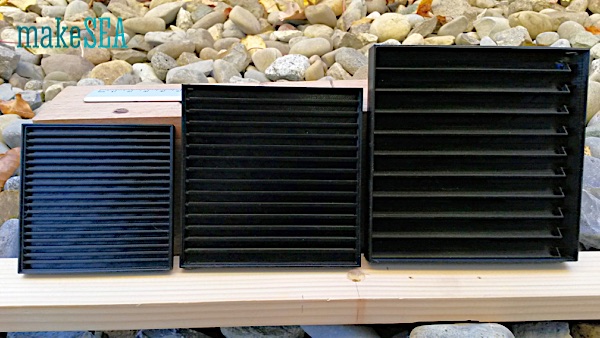
For each of the tiles above there is a short video illustrating the flow.

The lid must be printed with the orientation of the 3d-printed layers along the flow of the condensated water droplets. With wrongly oriented printed rills, the droplets would probably not flow into the collecting channel at the bottom, but they would fall back into the basins with the polluted water.
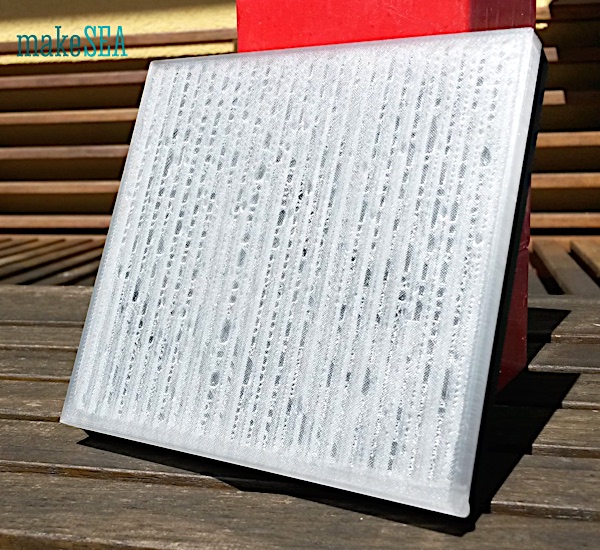
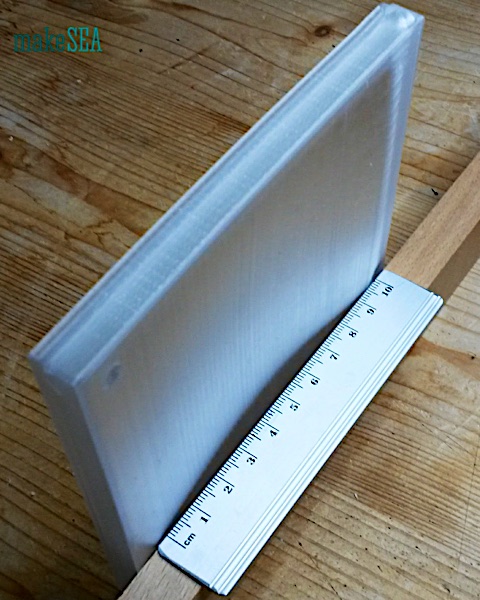
The image below shows the transparency with different print-settings. The two versions of the lid have different layer height, material flow-rate, and retraction settings. Influence of the parameters seem to be quite random - I shouldn’t have changed that much parameters at one. Certainly more work to-do for optimizing the transparency.
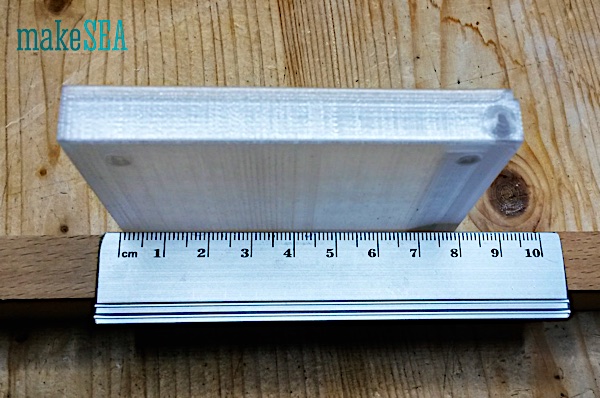
A much more relevant issue is warping. While the printing orientation is ideal for printing several lids at once, the large area is distorted, and the region of the 45° overhanging tile-channel is causing another bad warping effect. Mainly the outer surface is affected, but also the sealing edge to the base isn’t as straight as required. The effect gets worse the larger the tile size. In my tests only the 80 mm tiles were enough accurate. A small tile size has the disadvantage of many tile connections, and a reduces area for condensation (some area is wasted by channels and borders).
It also happened that there were bed-adhesion issues when printing the base tile. This problem is probably not very difficult to resolve. However the flat printing orientation has the disadvantage, that only one tile can be printed at once, and the operator has to more often start the printing. It would be better, if base tiles were designed in a way, where it was possible to print them upright (like the lids). Four or maybe even nine tiles could be printed in one pass (over night).
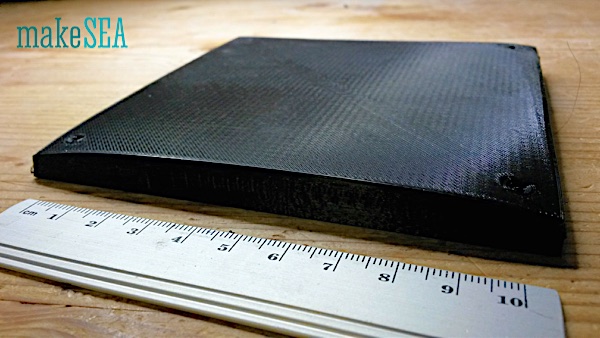
Also important: the tile-base needs to be watertight. It happened that I left a tile filled with water on my wooden table. After a while it was empty, and the table was wet. 100% infill for 3d-printing isn’t enough. Maybe the upright orientation like for the lid was even better than the horizontal plane of rectilinear crossing lines?
So far I only managed to print working tiles with 80 mm length. For an area of ½ m^2 there would be 78 tiles needed. With 120 mm tile size there are only 35 tiles needed. 160 mm tiles would be great!
Anyway this simple box isn’t as simple as I initially thought. The large size, and the flow of water are a big challenge. I’ve spent quite some effort in different shapes of basins and printed tons of boxes in various sizes. I’m still not happy with the result.