FrontPage

makeSEA Propellers

Details Print
Tags: propeller propellers


Propellers

(see also, Brushless Motor v2 re generator)

Idea / Motivation

Design a parametric propeller, useful as a fan or for an RC-plane.

Basically I wanted to know, if it is possible at all to create a 3d-printable propeller, which works with a satisfying efficiency. When successful it would be very useful, because pitch and diameter were freely adjustable, and I’m not restricted to the off-the-shelf propellers. The geometry of the propeller and the hub can be optimized for a specific the plane.

Implementation

The basic version of the propeller has 9 inch diameter and 4 inch pitch. The design allows to change both parameters, and also the number of blades from two to three (1 blade doesn’t make sense, and with 4 or more blades, the hub diameter needs to be increased as well in order to have enough space for the blade shafts).

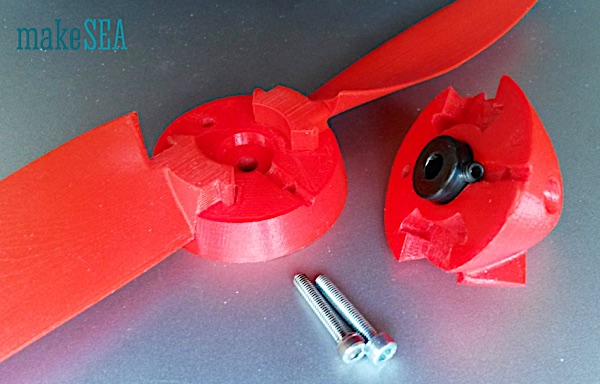
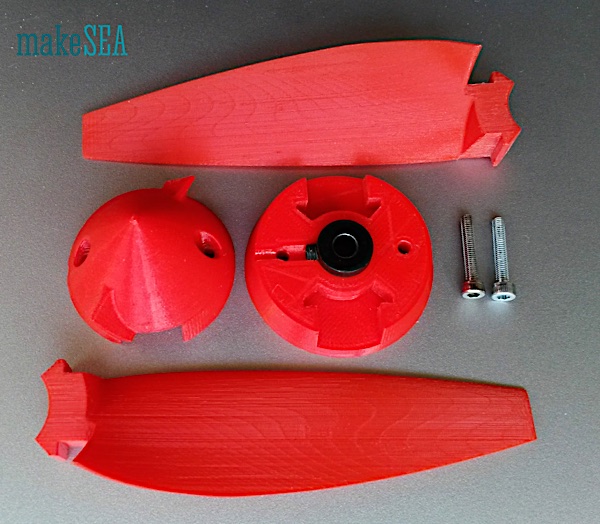
Blades and hub are separated parts. The two or three blades fit tightly into the gaps of the two pieces from the hub. The hub encloses a shaft collar. The set screw of the collar is used as cam. The two parts for the hub are held together with two or three screws (depending on the number of blades).

There are various benefits of having separated parts:

  1. Printing orientation can be adjusted in order to optimize layers for the high centrifugal forces.
  2. The adjusted orientation for printing the blades makes it possible, that none of the support material touches the critical parts of the surface. A rough surface would disturb aerodynamics.
  3. Blades are printable in a single pass, and therefore they have all the same weight and distribution of mass, even if the filament diameter has small variations. This is relevant for having the assembled propeller well balanced.
  4. A propeller as one piece doesn’t fit into a common 3d-printer.

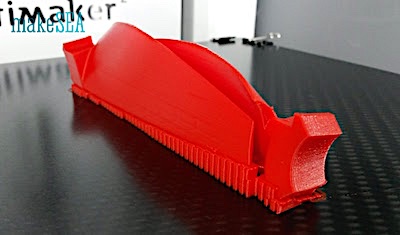
The image below illustrates the recommended printing orientation. As visible, it requires support material. The supported area at the front of the propeller is small and easy to sand. Anyway it is a good idea to also sand the surface of the blades. 400 grit with water gives good results.


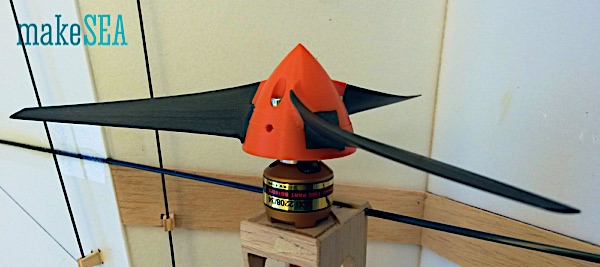
As material I recommend using PETG (and not PLA). I fear the brittle PLA can break catastrophically at higher RPM, if there is a little shock. I didn’t do a test to figure out the limiting RPM, but the PETG-version did work well on a plane with a common brushless motor at 10’000 RPM.

Using the Propeller on an RC Plane

I’ve replaced a common 2 bladed propeller with the 3d-printed version. Both propellers had the same diameter and pitch. The plane has a weight of roughly 350 g and 700 g thrust (twice the own weight). Performance was almost unchanged - there was no noticeable difference during flight. On the ground, the 3d-bladed propeller draws a bit more current, but the flight duration was still similar.

Using the Propeller as a Fan

If the Propeller is used as a fan, I recommend to print also a guard. The most dangerous parts are the fast moving tips of the blades, because they can easily cut through human skin. For this reason the guard consists of a ring around the propeller. This ring has a proper airfoil as a cross-section, so it works as a duct (and maybe even improves the propeller efficiency).

The ring is too large for a common 3d-printed, so I divided it into 5 separate parts.

The next image shows how to orient the objects for 3d-printing. 

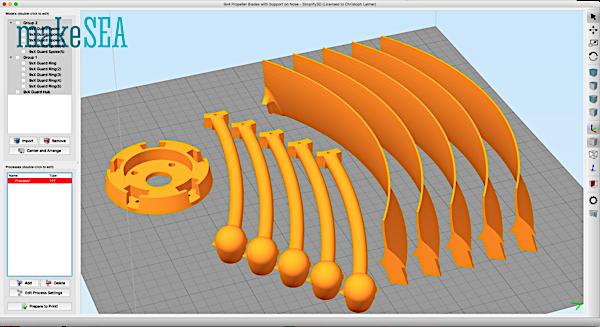
Support material needs to be activated in order to print the overhanging structures.


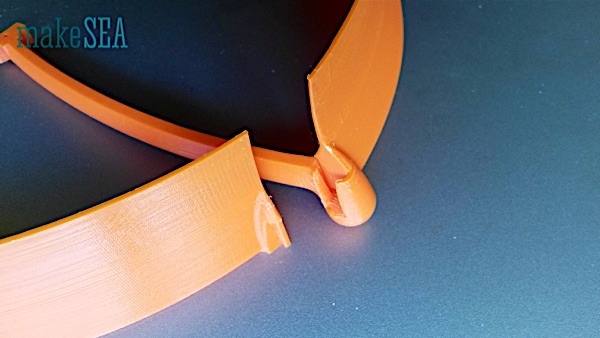
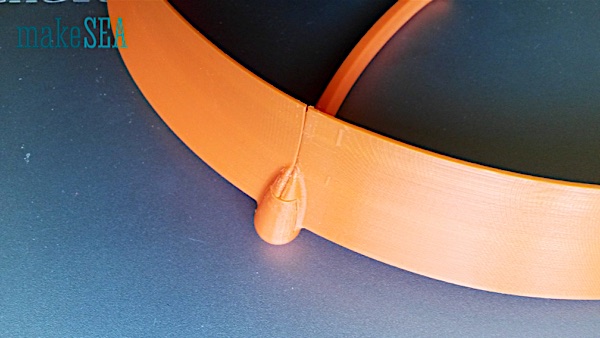
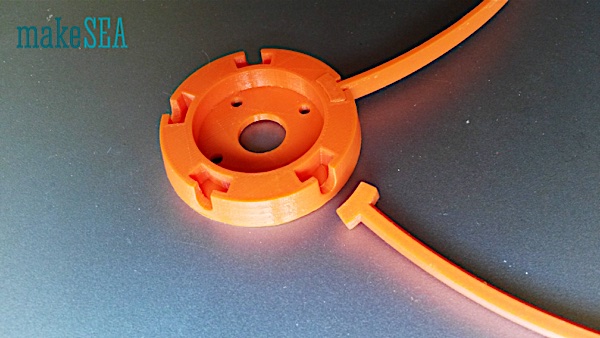
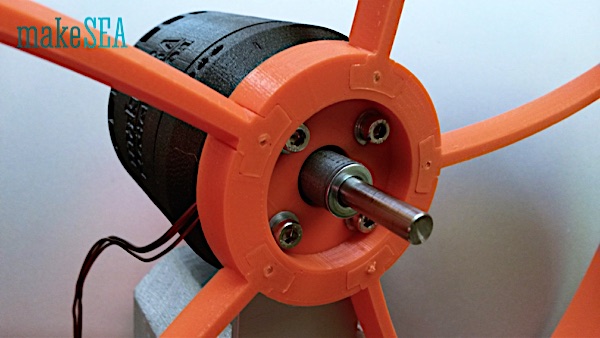
The ring is held together by rails at the end of the spokes. Because of the angled orientation, the ring segments won’t slide out, when fully assembled. Fife small screws are needed to fix the spokes at the hub.

The holes in the hub are compatible with the 3d-printed brushless motor.

Additional Information:

Related Video: RCPlane with 3-d printed motor and 3-d printed propeller


Download the Files for this Project

at the Mash Market HERE

0 Attachments
44907 Views
Average (1 Vote)
Comments
Please sign in to comment.
Where did you get the collar for the motor
0 (0 Votes)
  • Please sign in to reply.
Posted on 9/6/17 7:27 AM.
Help me
0 (0 Votes)
  • Please sign in to reply.
Posted on 9/6/17 11:53 AM.
About to have a go at printing the 3 blade 4" propeller and wonndered about thickness and infill using PETG and should the hub and cap be the same?
0 (0 Votes)
  • Please sign in to reply.
Posted on 9/28/17 8:22 AM.
I used normal setting in cura with my luzbot mini printer. It seems to work great. The propeller will break if it hits anything. If you increase the infill, it would make it heavier and would not work as good.
+1 (1 Vote)
  • Please sign in to reply.
Posted on 11/15/17 6:42 AM in reply to Mark Craih.
Thank you very much!
0 (0 Votes)
  • Please sign in to reply.
Posted on 12/28/18 7:59 PM.
How is it possible to customize these propellers? All I see are downloadable files, nothing to customize. I'm looking for a significantly larger prop than 9 inches... building the Halbach array motor... Thanks.
0 (0 Votes)
  • Please sign in to reply.
Posted on 4/5/20 9:51 PM.
Hello, I don’t think there is a way to customize this propeller, but you could scale up the model In your slicing software. Although I ready don’t suggest printing propellers, because they need to be precision machines with high accuracy. Not sure if you know this, but propellers need to be perfectly balanced so it does not shake while spinning at high speeds. Hope this help. Have a great day.
0 (0 Votes)
  • Please sign in to reply.
Posted on 4/5/20 10:00 PM in reply to Ben Bushong.
Well, I was just curious, because everything in the narrative says they can be customized, the hub can be customized to the motor, diameter and pitch can be changed... I want about a 4 bladed 15 or 16 inch prop to use for a fan... with this method, printing the blades separate from the hub, that'd easily be possible.
0 (0 Votes)
  • Please sign in to reply.
Posted on 4/5/20 10:52 PM in reply to Eric Charles Robb.