There are many different types of filament-materials available for 3d-printing, and the variety is extended continuously. In particular I wanted to find a material, which is flexible and strong. I’ve ordered a bunch of sample filaments from various online stores. The effort to get familiar with a new material is very high, and I wasn’t yet able to try all my samples. NinjaFlex is quite popular, and there are many reviews available (e.g. https://www.youtube.com/watch?v=7_CNnaOf5B8). It also was easy to print in my case. In particular I had a closer look to another Filament called “Flex ProFill”. Compared with NinjaFlex the ProFill appears a bit less flexible, but much stronger, when you try to tear the raw filament apart (manual test).
Material Source:
I decided to buy the 1.75 mm filament, because I intended to print it on the Makerbot R2x, which has the feeder motors on the print-head. A short distance between feeder and extruder nozzle makes it simpler to control the process. The heavy head is a disadvantage for printing fast and accurately, but flexible materials have to be printed slowly in general.
My local supplier of the Flex Profill provides print settings on his webpage. I guess these settings work well, however I found my own setup (which also work well). In particular I played with a lower extrusion temperature, in order to reduce warping and adhesion problems.
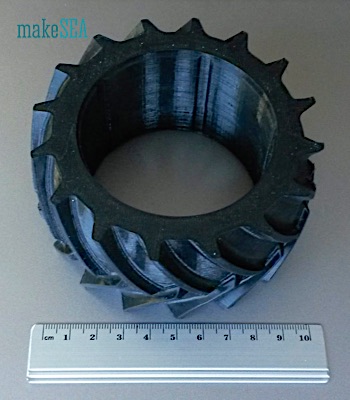 | The material feels like rubber, ideal to print a durable tyre. I’ve designed a parametric tractor tyre. Width, diameter, thickness, profile depth and angle are adjustable.
Printing time for the 70 mm rim size was almost 24 hours. 45° overhanging structures were only a problem at the corners of the tyre profile. The 3d-printed tyre with 70 mm rim is big enough for a medium size RC-car. It feels not as squishy as a regular RC-car tyre, but it’s possible to bend and deform it by hand without damaging the tyre. |
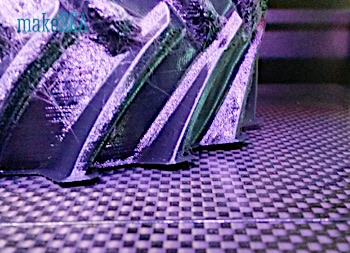 | Even though the platform was coated with PVA, the tyre came off after a while. This didn’t ruin the printed tyre, because it happened only very late, and very slowly. The reason is certainly the material shrinkage and the “huge” size of the object, but also the degrading of the PVA coat at 70°C during 24 hours. Nevertheless a “brim” is recommended to improve adhesion, when printing large objects. Smaller (lower) objects don’t need a brim. |
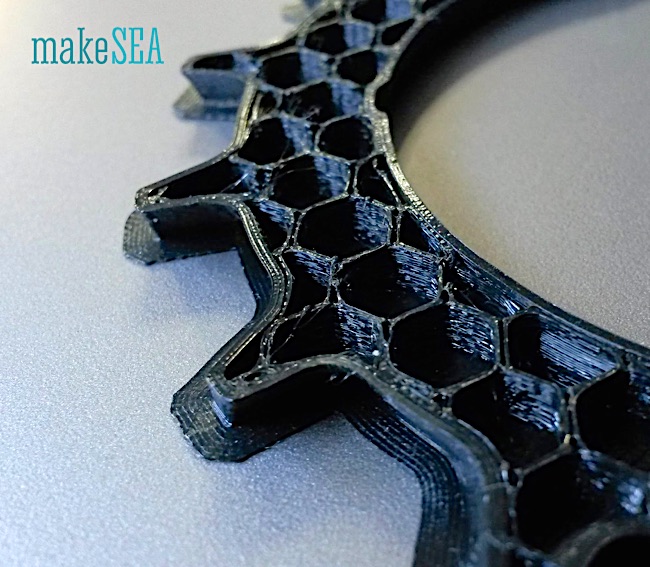
| The squishiness can be influenced by the infill. I recommend 15% hexagonal infill. Too little infill can cause problems with the covering top layers. Maybe 50% “catfill” could useful? In order to be squishy the internal structures shouldn’t be too rigid, no truss - like “catfill”. |
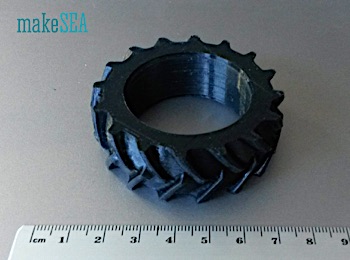 | I’ve also printed a smaller tyre (40 mm rim). Perfect adhesion until the end. |
Conclusion: A tyre is relative simple to design and print. Probably a tyre with a smaller profile for a paved streets would be even simpler than the tractor tyre. The material appears very strong, but tests need to be done where a tyre is used on a vehicle.
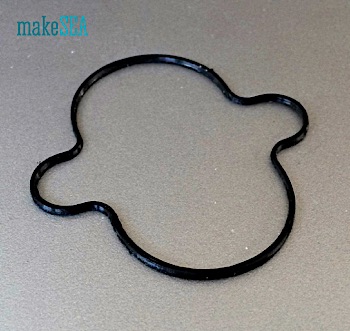
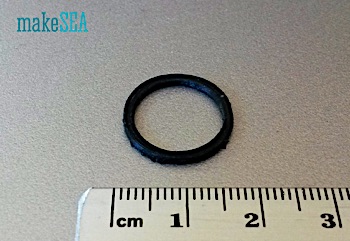 | This ring has a shape almost like a torus. In order to prevent 45° overhanging structures I’ve designed the ring with an octagonal cross-section. Printing on the PVA coated platform is very simple it doesn’t even need a brim. The resulting ring should be useful as a sealing maybe as a replacement for a broken tap sealing. The next pictures show, how the material can be bent or stretched. Actually I overstretched it a lot, and it needed quite some force (I couldn’t do this test without the help of pliers). |
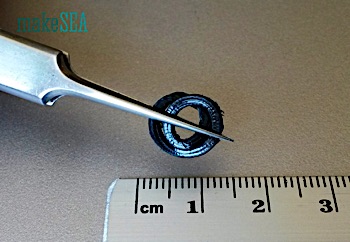 | 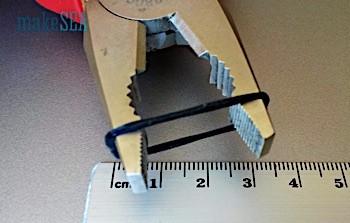 |
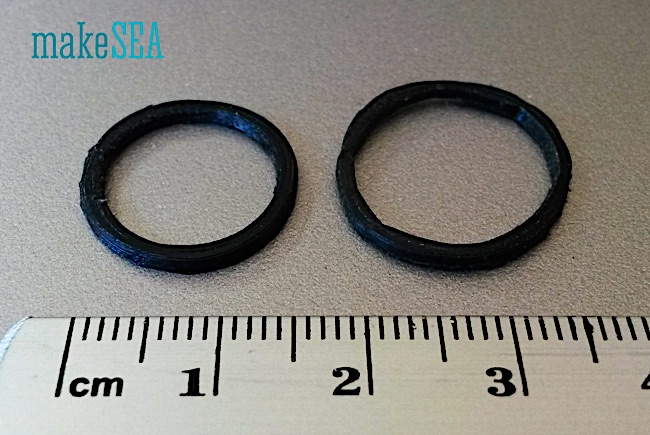
It didn’t break, but it also did not go back to it’s original shape. The picture below shows control and treated objects side-by-side.
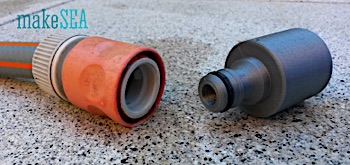
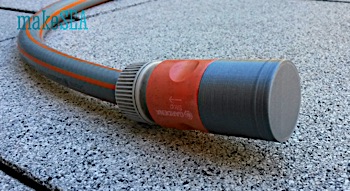
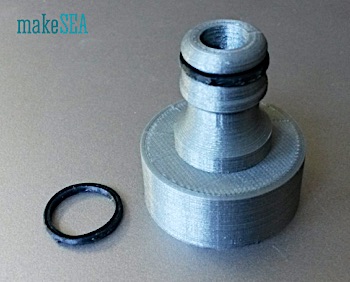
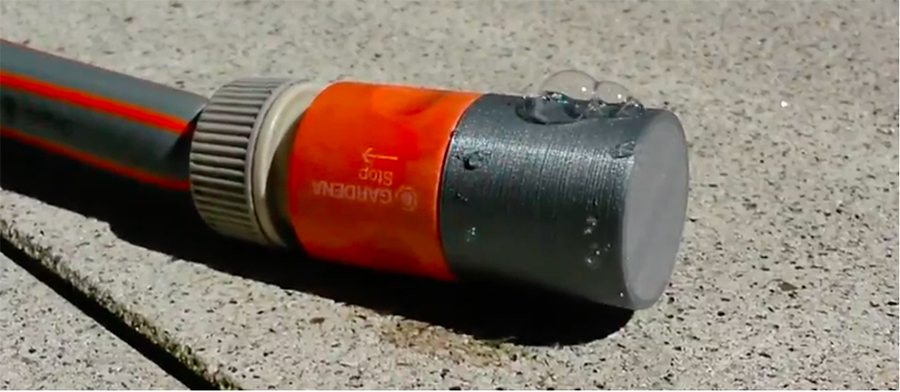
In order to test the functionality of a seal in real live, I’ve designed a coupler for the garden hose. My design is compatible with the Gardena system. I’ve printed the coupler itself with PETG, and the sealing ring was done with the actual “Flex ProFill”. The ring can be slead over the coupler with some stretching (no risk of permanent deformation).
 |
|
In my test the coupler doesn’t have an exit for the water - like a cork on a bottle. The result is surprising:
(see video)
With approx. 25 PSI water pressure, the sealing ring did a very good job. However the “cork” was not 100% water-tight. The remaining air in the hose and the water were causing bubbles and a funny sound. The PETG did withstand the pressure, but there were obviously small holes in the structure. Walls are 2.4 mm thick (6 outlines), Bottom and top 8 x 0.15 mm, infill 50% (no matter for my design, because the test-cork is hollow). The actual print was done with 130% material flow (over-extruded), because I wanted to be sure, that the shell layers were printed really compact. Nevertheless the amount of lost water was not big. Applications for the garden are well doable.
The shared design files below are not the cork-version, but only they have a 9 mm exit for the water, and it shouldn’t be too difficult to integrate it into another design.
Below a model of a gear-pump. Unfortunately the pump didn’t really work, because too much water passes between the gears and the wall of the housing. However the sealing ring works really well. When connecting the garden hose and “flooding” the case with water at 25 PSI, the water exits everywhere but not at the sealing.
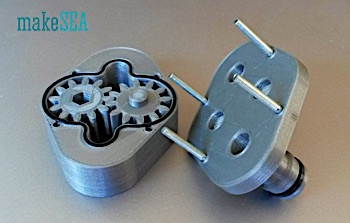
This example clearly demonstrates to power of 3d-printing: a common rubber-band probably would not work - it would jump out of the groove before the lid could be closed. 3D-printing this special shaped sealing ring is very simple and takes only a few minutes.
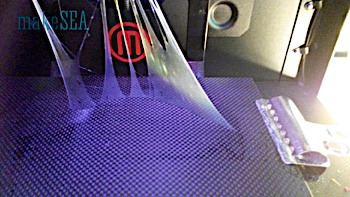
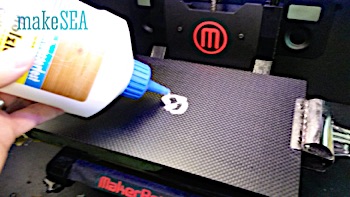
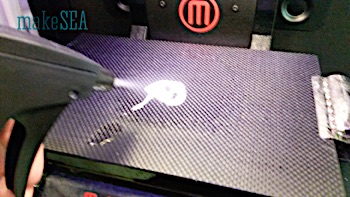
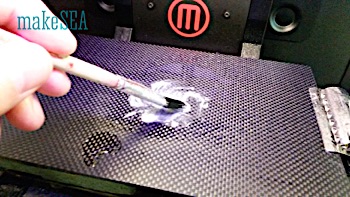
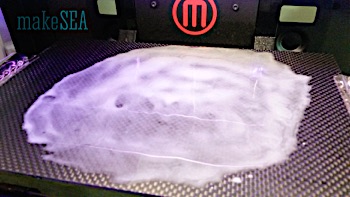
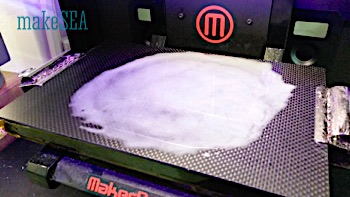
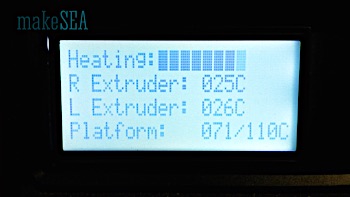
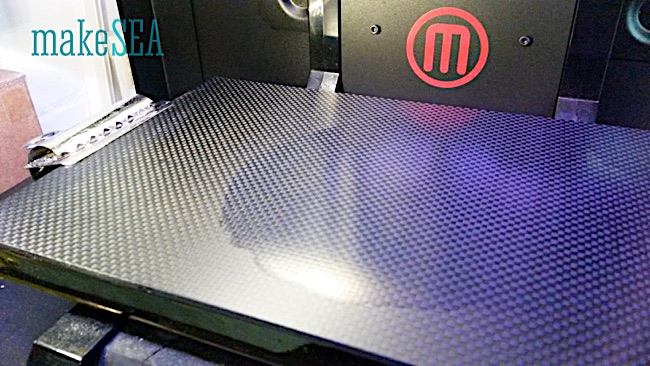
I’m using a carbon fiber plate, but the coating probably work also on glass. Apply a bit of PVA glue (regular white/wood glue), dissolve it with some water (I have my mix of water+alcohol, which I’m also using for cleaning), evenly mix and distribute it with a brush, heat-up the platform to 70°C (it accelerates the drying). Wait until the white shimmer disappears.
 |  |  |
 |  |  |
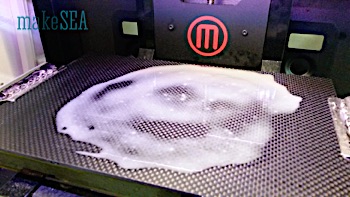 | 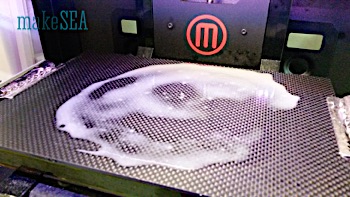 |  | 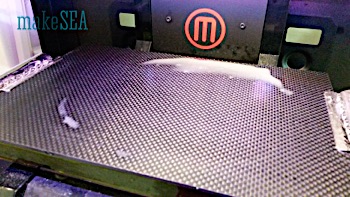 |  |
The coated surface can be used several times, unless it comes off when removing the printed object with brute force while it’s not cooled down to room temperature. The coating also works for printing many other types of material (in particular Nylon). Adhesion is best, when the PVA just dried, and after a couple of hours/days the adhesion decreases.
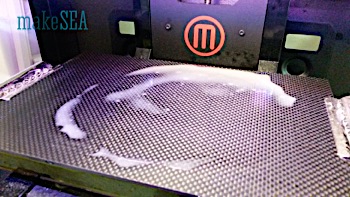
Removing the coat is simple and “clean”: make it a little wet, and pull on a “corner”. The pictures look disgusting, but the coat comes off the platform almost 100% in one piece (depending on the glue and the amount of water). You need to play, but it doesn’t take long until the printer is ready for another material.